Migrate Notes from Evernote to Zim
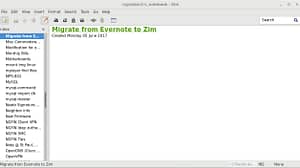 Looking to move your notes from Evernote to Zim? Here are simple steps to guide you through this migration.
Migrate Notes from Evernote to Zim
Last year when Evernote decided to limit the Free account to sync on only 2 devices, I decided that was enough. I didn’t sync more than 2 devices, but deep in my heart, I knew where they were heading. Plus being an opensource advocate, Evernote just didn’t jive with my standards. Zim seemed like a step in the right direction. So I started the rocky journey of migrating Evernote to Zim.
What is Zim
Zim is a graphical text editor used to maintain a collection of wiki pages. Each page can contain links to other pages, simple formatting and images. Pages are stored in a folder structure, like in an outliner, and can have attachments. Creating a new page is as easy as linking to a nonexistent page. All data is stored in plain text files with wiki formatting. Various plugins provide additional functionality, like a task list manager, an equation editor, a tray icon, and support for version control.

If you desire, you can sync your note across devices with tools like Syncthing, OwnCloud, Nextcloud or other solutions. I must mention that there is NOT an Android Zim client at this time, so that is one glaring issue.
I’m going to be 100% honest, these notes imported from Evernote to Zim, while exported, are going to be severely lacking any semblance of decent formatting, but at least I don’t have to recreate everything. If you need to get off Evernote now, this may be the answer…. but count on lots of reformatting in the future. I plan to reformat mine, as I refer to an individual note. Sure I may never be done, but I won’t be editing 1000’s of notes at one time.
Export Evernote
Find your local Evernote DB
Grab a copy of your evernote db (must have the Windows or Mac Client for this part, and be synced)
The file will be named something .exb
example: jones.exb
On Windows 10 you’ll find the file in this path:
C:\Users\your account name\AppData\Local\Evernote\Evernote\Databases
Export your Evernote Notes
In the Evernote client, select ALL your notes, then click “File” – “Export“, and select “Export as multiple Web pages (.html)”, then click the “Export” button at the bottom of that window. Save these exported notes to the folder of your choice. In this example, we save our notes to a folder called “exportednotes”
Now copy your Evernote DB file and the folder with your exported notes to a Linux PC or VM. This is also a good time to put a copy on a USB Drive for backup.
Convert your Evernote Notes to Zim txt files
Now on your Linux computer (with python installed), you need to create a folder to put all this stuff into.
Create a folder name work, in your homedir ( ~/ is a “shortcut” to your home directory)
mkdir ~/work
Now create 2 subfolders in work
mkdir ~/work/db
mkdir ~/work/output
Copy your Evernote DB file to ~/work/db
Copy your folder with all your exported Evernote Notes into ~/work/. Now you should have 3 folder inside the work folder: db, output and exportednotes.
Download the python script that does the conversion
You need a copy of evernote-exporter (shawndaniel) from GitHub.
https://github.com/shawndaniel/evernote-exporter
The only file you need is evernote_exporter.py
Modify the evernote_exporter.py script
I’m not sure why, but there appears to be a syntax error in this file.
Find this line (it should be line 105 or really close)
new_c = content.replace('####', '=').('### ', '== ').replace('## ', '==== ').replace('# ', '====== ')
This line is missing a “replace”, so replace the entire line with this line:
new_c = content.replace('####', '=').replace('### ', '== ').replace('## ', '==== ').replace('# ', '====== ')
Add your directories to the evernote_exporter.py script
Toward the bottom of this file look for these lines and replace them with your paths (remember the work directory, we created above? Replace username with your username)
notes_dir = ‘/home/username/work/exportednotes’
db_dir = ‘/home/username/work/db/evernote.exb’
output_dir = ‘/home/username/work/output’
While you are down there, look slightly above this section to find this line
def backup(self, notebooks_to_dirs=True, to_markdown=False, zim_sintax=False):
and change the False to True so the line reads like this:
def backup(self, notebooks_to_dirs=True, to_markdown=True, zim_sintax=True):
Run the script
Make sure that the evernote_exporter.py is in your ~/work directory, then cd into ~/work.
Now run the script
python evernote_exporter.py
Your output should look like this
Organizing notes by directory (based on notebooks & stacks)...
    notebooks/stacks exported: 0evernote_exporter.py:219: UnicodeWarning: Unicode equal comparison failed to convert both arguments to Unicode - interpreting them as being unequal
  if fl_name in notes_set:
    notebooks/stacks exported: 2
 Transfering the rest of the files that do not belong to a notebook...
    copied files/dirs: 439
 Converting note syntax...
    edited files: 778
 Converting note syntax...
    edited files: 778
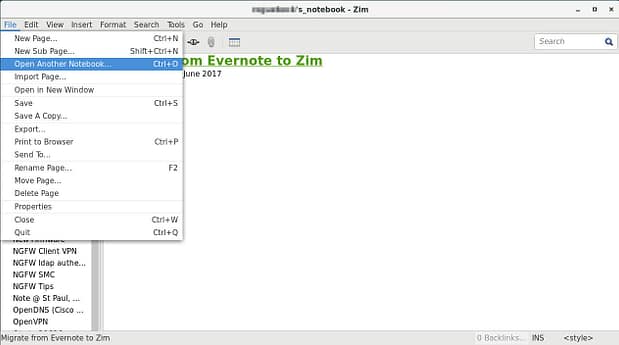
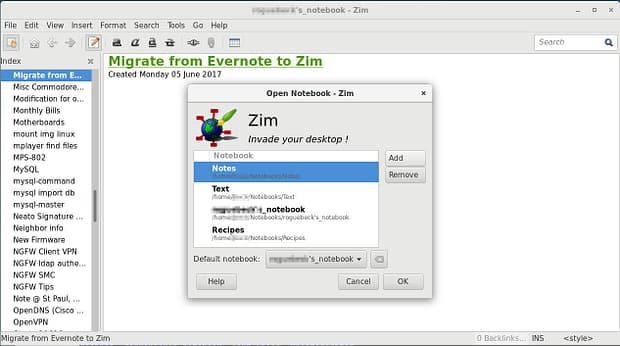
When the script has finished running, you will have some new folders in your /home/username/work/output directory. Copy those to your Zim Notebook directory, then within Zim, you can add these new folders as new Notebooks
Here you can click Add, and browse to your folders that you just added to Zim’s notebook folder.
There you go. You have the content of your Evernote imported into Zim. I will update this post when I find better tools, or re-write the python scripts or create my own. Now all you need to a method to synchronize your notes across multiple computers (Syncthing is perfect for this).
Make sure to burn a copy of your Zim notes on CD/DVD or copy to a USB Drive for backup.
If you have a better script to migrate Evernote to Zim, point me to it, and I’ll try it out!
Filed under: Scripts,Tips & Tricks,Uncategorized - @ June 5, 2017 7:39 pm
Tags: evernote, notes, open source, sync, zim
this was very helpful, thanks. I was following the instructions on github page, but it didn’t specify that you needed to export the evernote notes as independent html files.
Thanks. It took some mucking around before I was able to figure out how to make it work.